


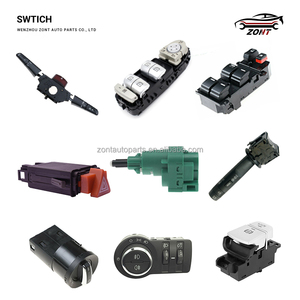
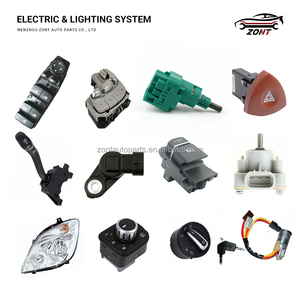


Types of Honda Power Window Switches
The Honda power window switch is a critical component that controls the window-lifting mechanism in various Honda vehicles. Understanding the different types available can help you choose the right replacement or understand your vehicle's features better.
Single Switch
Single switches control one window and are typically located on the door panel of the specific window being controlled. These are the most basic type and commonly found in rear windows of many Honda models.
Best for: Rear passenger windows, basic window control needs
Master Control Switch
Located on the driver's door panel, this comprehensive switch controls all windows in the vehicle from one central location. Often includes window lock controls to restrict operation from other panels.
Best for: Driver convenience, complete window control
Illuminated Switch
Features backlighting that makes icons and text visible in low-light conditions, enhancing visibility and user experience while driving at night or in dimly lit environments.
Best for: Night driving, enhanced visibility
Expert Tip: Many Honda vehicles manufactured after 2010 incorporate multiple switch types into a single unit. For example, a master switch might also feature illumination and auto up/down functionality.
| Switch Type | Main Features | Common Honda Models | Typical Location |
|---|---|---|---|
| Single Switch | Basic operation, simple design | Civic, Accord, CR-V | Passenger doors |
| Master Control Switch | Controls all windows, includes lock function | All Honda models | Driver's door |
| Illuminated Switch | Backlit for nighttime visibility | Accord, Pilot, Odyssey | All doors |
| Touch Sensitive Switch | Requires gentle tap, modern design | Newer Accord, CR-V models | All doors |
| Auto Up/Down Switch | One-touch full operation | Most modern Honda vehicles | Driver's door primarily |
| Anti-Trap Switch | Safety feature that prevents injuries | Newer Accord, Pilot, Odyssey | All power windows |
Advanced Window Switch Features
- Express/One-Touch Operation: Allows windows to fully open or close with a single brief press, enhancing convenience during driving.
- Child Safety Lock: Prevents rear window operation, particularly useful for families with children.
- Anti-Trap Technology: Automatically reverses window movement if an obstruction is detected, preventing injuries.
- Touch Sensitive Operation: Modern switches requiring only a gentle touch rather than mechanical pressure.
Specifications and Maintenance of Honda Power Window Switches
Technical Specifications
Voltage Rating
12V DC
Compatible with standard automotive electrical systems
Current Rating
20-30 Amps
Varies by model and window motor requirements
Contact Resistance
5-10 mΩ
Low resistance ensures efficient current flow
Insulation Resistance
≥10 MΩ
Prevents electrical leakage and system damage
| Specification | Details | Importance |
|---|---|---|
| Switch Type | Rocker, toggle, and push-button designs | Affects user experience and aesthetic integration |
| Window Control | Individual or multi-window control capability | Determines functionality and convenience |
| Illumination | LED backlighting for nighttime visibility | Enhances usability in low-light conditions |
| Materials | Durable plastics and metals for housing and components | Affects longevity and resistance to wear |
Maintenance Advice: Most window switch issues are caused by dirt accumulation or electrical connection problems. Regular cleaning and ensuring secure connections can prevent many common problems.
Essential Maintenance Practices
- Regular Inspection: Check switches periodically for signs of wear, damage, or dirt accumulation. Include inspection of window motors and tracks during maintenance.
- Proper Cleaning: Use a soft cloth with mild soap solution to clean switch surfaces. Avoid harsh chemicals or abrasive materials that can damage plastic components or erase indicator symbols.
- System Lubrication: While the switches themselves don't require lubrication, regular maintenance of window motors and tracks ensures smooth operation and reduces strain on switches.
- Electrical Connection Check: Verify secure electrical connections and watch for signs of corrosion or damage in wiring harnesses.
- Timely Replacements: Replace worn or damaged switches promptly using genuine Honda parts to ensure proper fit, function, and longevity.
- Prevent Overloading: Avoid operating multiple windows simultaneously for extended periods to prevent circuit overload and switch overheating.
How to Choose a Honda Power Window Switch
Selecting the right power window switch for your Honda ensures proper fit, functionality, and longevity. Consider these critical factors before making your purchase:
Vehicle Compatibility
Always check compatibility with your specific Honda model, year, and trim level. Switches are often designed for particular vehicle configurations and may not be interchangeable across different models or even production years.
Verification tip: Use your Vehicle Identification Number (VIN) to ensure exact part matching.
OEM vs. Aftermarket
Original Equipment Manufacturer (OEM) switches are made by or for Honda and offer optimal fit and function. Aftermarket alternatives may be less expensive but can vary in quality, durability, and exact fitment.
Price difference: OEM parts typically cost 30-50% more than aftermarket alternatives.
Functionality Requirements
Ensure the replacement switch offers all the functions of your original switch, including auto up/down, illumination, or child safety features if your original had these capabilities.
Compatibility note: Some advanced features may require additional vehicle wiring or systems compatibility.
Warning: Installing a switch with incorrect electrical specifications can lead to window motor damage, electrical system issues, or even fire hazards. Always verify voltage and current ratings match your vehicle's requirements.
Additional Selection Criteria
- Quality and Reliability: Research brand reputation and warranty offerings to ensure durability.
- Installation Complexity: Some switches require simple snap-in installation while others may need wiring modifications or programming.
- Warranty Coverage: Look for switches with solid warranty protection, especially for more expensive OEM parts.
- Customer Reviews: Check feedback from other Honda owners who have installed the same switch in similar vehicles.
- Price Considerations: Balance cost against quality, with understanding that the lowest-priced options may not provide long-term reliability.
DIY Honda Power Window Switch Replacement Guide
Replacing a Honda power window switch is a manageable DIY task for most vehicle owners, potentially saving you $50-150 in labor costs. The entire process typically takes 30-60 minutes depending on your vehicle model and switch location.
Before You Begin: Purchase the correct replacement switch, verify it matches your specific vehicle model and production year, and ensure you have all necessary tools before starting the replacement process.
Required Tools
- Flathead and Phillips screwdrivers (various sizes)
- Trim removal tool or plastic pry tool (to prevent dashboard/door panel damage)
- New power window switch assembly
- Electrical contact cleaner (optional but recommended)
- Needle-nose pliers (for electrical connector removal if needed)
- Microfiber cloth (for cleaning)
Step-by-Step Replacement Process
- Prepare the Vehicle: Turn off the ignition and remove the key. Disconnect the negative battery terminal to prevent electrical shorts or accidental airbag deployment during the procedure.
- Access the Switch: Use the trim removal tool to carefully pry around the switch panel or door panel trim. Work slowly around the edges to avoid breaking the plastic clips. Some Honda models may require removing screws hidden under trim pieces.
- Remove the Switch Assembly: Once exposed, the switch may be held in place with screws or simply snap into the assembly. Remove any fasteners, then gently pull the switch from its mounting location.
- Disconnect Electrical Connections: Press the tab on the electrical connector(s) and pull to separate them from the switch. Note the orientation of the connectors for proper reassembly. Apply electrical contact cleaner to the connectors if they show signs of corrosion.
- Install the New Switch: Connect the electrical connectors to the new switch, ensuring they click securely into place. Align the switch with the mounting location and press firmly until it seats properly.
- Reassemble Trim Pieces: Replace any screws that were removed, then carefully snap the trim or cover pieces back into place, ensuring all clips engage properly.
- Test Functionality: Reconnect the battery, then turn on the vehicle's ignition (without starting the engine) and test all functions of the new switch to verify proper operation before completing the installation.
- Final Inspection: Check that all trim pieces are secure and properly aligned before considering the job complete.
Safety Notice: If your vehicle is equipped with side airbags, take extra caution when removing door panels. Always disconnect the battery and wait at least 10 minutes before beginning work to allow the airbag system to deplete its stored energy.
Frequently Asked Questions
What is the main function of the Honda power window switch?
The Honda power window switch is a control interface that allows drivers and passengers to electronically raise and lower vehicle windows. It sends electrical signals to the window motor, which then activates the mechanical window regulator system. Modern switches often include advanced features like auto-up/down functionality, anti-pinch safety systems, and window lock capabilities for enhanced convenience and safety.
Why is the Honda power window switch important for vehicle operation?
The power window switch is a crucial component of your Honda's convenience and safety systems. It provides:
- Effortless window operation without manual cranking
- Driver control over all vehicle windows through the master switch
- Safety features like child locks and anti-trap protection
- Enhanced driving comfort through quick and precise window adjustments
- Improved vehicle security by allowing rapid closure of all windows
How can I maintain Honda power window switches for optimal performance?
To keep your Honda power window switches functioning properly:
- Regularly clean switch surfaces with a soft, slightly damp cloth to remove dust and oils
- Avoid spilling liquids on switch assemblies
- Use compressed air to remove debris from switch crevices
- Inspect electrical connections periodically for corrosion or looseness
- Operate switches with appropriate pressure - excessive force can damage internal components
- Address any unusual sounds or delayed operation immediately to prevent further damage
What should I do if my Honda power window switch malfunctions?
If you experience issues with your Honda's power window switch:
- First check the window fuse in your vehicle's fuse box (consult your owner's manual for location)
- Test all windows to determine if the problem is isolated to one switch or affects the entire system
- Inspect the switch for visible damage or foreign objects
- Check for any error messages on your dashboard that might indicate electrical system issues
- If the issue persists, consult a Honda dealer or qualified mechanic for professional diagnosis
Can any Honda power window switch be used in any Honda vehicle?
No, Honda power window switches are typically designed for specific vehicle models, production years, and trim levels. Using an incompatible switch can result in:
- Improper fitment in the door panel or console
- Missing functionality (such as auto up/down or illumination)
- Electrical compatibility issues
- Aesthetic inconsistencies with interior design


 浙公网安备 33010002000092号
 浙B2-20120091-4