(95 products available)




![[KOOCU] V506 200-480 60W Digital LCD Thermostat AC 220V Soldering Iron PENCIL Power Plug](http://s.alicdn.com/@sc04/kf/HTB1Gp54n6nD8KJjSspbq6zbEXXaL.jpg_300x300.jpg)
![[KOOCU] V506 200-480 60W Digital LCD Thermostat AC 220V Soldering Iron PENCIL Power Plug](http://s.alicdn.com/@sc04/kf/HTB1dh2XQFXXXXX9XVXXq6xXFXXXJ.jpg_300x300.jpg)
![[KOOCU] V506 200-480 60W Digital LCD Thermostat AC 220V Soldering Iron PENCIL Power Plug](http://s.alicdn.com/@sc04/kf/HTB1eJgMlyqAXuNjy1Xdq6yYcVXar.jpg_300x300.jpg)
![[KOOCU] V506 200-480 60W Digital LCD Thermostat AC 220V Soldering Iron PENCIL Power Plug](http://s.alicdn.com/@sc04/kf/HTB1JcZ_e2jM8KJjSZFNq6zQjFXa9.jpg_300x300.jpg)
![[KOOCU] V506 200-480 60W Digital LCD Thermostat AC 220V Soldering Iron PENCIL Power Plug](http://s.alicdn.com/@sc04/kf/HTB17h0Mn8DH8KJjSszcq6zDTFXaL.jpg_300x300.jpg)




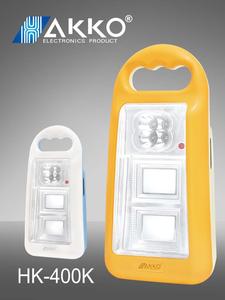




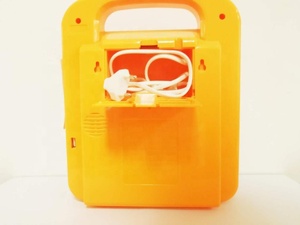
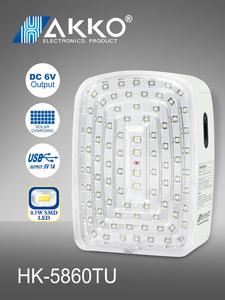
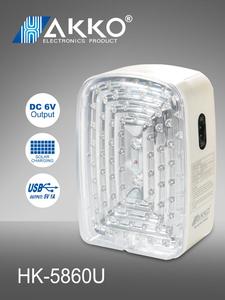
With the emergence of new technologies, the traditional ways of doing things are gradually being overtaken. For example, in the past, people used to write and draw on papers. Nowadays, papers are being surpassed by LED technology. LED technology is an invention that has transformed the world. LED lights have a lot of significance in everyday lives, from illuminating homes to enhancing visibility on roadways. Among the numerous innovations in the field of LED lighting is the Hakko LED, a game-changer in the world of soldering and electronics.
There are different types of Hakko LED lights, each designed to suit a specific purpose. They include:
Input voltage
The voltage of the power supply that the LED must connect to is called the input voltage for LEDs. It is typically 5V, 12V, or 24V. Always ensure the input voltage matches the LED's rated voltage to prevent damage.
Input current
The input current for LEDs is the amount of electrical current supplied to the LED from the power supply. It is usually measured in milliamps (mA) and can range from 20mA to several hundred mA depending on the type of LED. The current affects the brightness of the LED - higher currents result in brighter illumination.
Power consumption
The power consumption of an LED is how much electricity it uses, which is calculated by multiplying the input voltage by the input current. This tells users how much energy the LED will use and can help them choose more energy-efficient lighting options. For example, an LED with a lower power rating may be brighter than a traditional light bulb, allowing users to reduce energy consumption.
LED size
The size of an LED is determined by its physical dimensions, which are usually given in millimeters. Common sizes include 0603 (1.6 x 0.8 mm), 0805 (2.0 x 1.3 mm), 1206 (3.2 x 1.6 mm), 2010 (2.0 x 1.0 mm), and 3528 (3.5 x 2.8 mm). Larger LEDs emit more light and are easier to see from a distance, while smaller ones take up less space on a circuit board.
Regular Inspection
Regular inspection involves checking the LED lights for any signs of damage, wear, or decreased performance. This helps to identify potential issues early on so that necessary repairs or replacements can be made, ensuring the LED lights continue to function optimally.
Cleaning
Over time, dust, dirt, and debris can accumulate on the surfaces of LED lights, obstructing their ability to emit light effectively. Cleaning involves removing these contaminants, restoring the brightness and visibility of the LED lights. This is particularly important for outdoor LED lights exposed to environmental elements that can lead to a build-up of grime and dirt.
Check Electrical Connections
LED lights are powered through electrical connections that provide the required voltage and current for their operation. Periodically inspecting these connections for any loose or corroded connections is essential, as loose connections can disrupt the power supply, leading to flickering, dimming, or complete failure of the LED lights.
Replace Faulty LEDs
With time and usage, certain individual LEDs or entire LED modules can develop faults, resulting in issues like dimming, color shifting, or complete failure. Once identified, it is essential to replace these faulty LEDs to maintain the desired lighting quality and performance standards.
Inspect and Replace Drivers
LED lights require specific drivers to convert electrical power into the voltage and current needed for optimal operation. These drivers should be regularly inspected for any signs of failure or performance degradation. In case of any issues, replacing the drivers is essential to ensure the LED lights continue receiving stable and efficient power supply.
Trim Surrounding Vegetation
For outdoor LED lights, overgrown vegetation can obstruct the emitted light, reducing its effectiveness. Regularly trimming and managing the surrounding plants ensures the LED lights illuminate the intended area without hindrance.
When buying HAKKO soldering iron with LED lights, retailers and other bulk buyers need to consider several factors. Here are some of them:
The Purpose of Soldering Iron
Different projects have different requirements. Is it a light, delicate project like a circuit board, or a heavy, thick project like a power electronics circuit? The purpose of the soldering iron will help determine the size of the tip and the wattage of the soldering iron.
Type of Soldering Iron
There are two main types of soldering irons. The first is the soldering iron with a plugged-in power source. The second is a battery-powered or rechargeable soldering iron. Battery-powered soldering irons are more portable and versatile.
The Skill Level of the User
For beginners, it is advisable to go for soldering irons that have temperature controls and are not very heavy. Experienced users can get heavier soldering irons with fixed temperatures.
Additional Features
Besides the HAKKO LED, the soldering iron can have many other features. For example, it can have a built-in fan, be quick-heating, have a sleep mode, or be auto temperature adjusting. These additional features can help improve comfort and convenience.
Here is a step-by-step guide on how to replace HAKKO LED lights:
Switch off the power supply
Before starting any replacement work, ensure the soldering iron is turned off and cooled. Also, disconnect it from the power supply.
Identify the soldering iron model
Different HAKKO soldering irons have distinct methods of accessing and replacing the LED. Check the user manual to know how to replace the LED for a specific model.
Gather necessary tools
Get the necessary tools required to replace the HAKKO LED. This includes; a new LED light, a screwdriver, a soldering iron, and soldering wire.
Disassemble the soldering iron
Use a screwdriver to disassemble the HAKKO soldering iron. Disconnect the screws and open the body to access the LED light.
Desolder the old LED
Use a soldering iron to melt the solder holding the old LED in place and carefully remove the old LED from the circuit board.
Install the new LED
Carefully place the new LED into the appropriate position on the circuit board and solder it using the soldering iron, ensuring proper polarity.
Reassemble the soldering iron
Once the new LED is installed, reassemble the HAKKO soldering iron by closing its body and fastening all the screws.
Connect to power supply and test
Connect the soldering iron to the power supply and test whether the new LED is working properly.
Q1: What is the most common problem with LED lights?
A1: The most common problem with LED lights is that they are not bright enough. This is true, especially if the LED lights are old.
Q2: How long do LED lights last?
A2: LED lights last up to 50,000 hours. This is one of the advantages of LED lights over traditional light bulbs.
Q3: Why are my LED lights flickering?
A3: LED lights can flicker because of a faulty connection, incompatible dimmer switches, or low voltage.
The web search volume for the keyword "hakko led" shows a consistent average monthly search of 0, with no change observed over the past three months or one year. The data from December 2023 to November 2024 indicates a steady zero web search volume each month.
This trend suggests a stable, non-existent interest in the keyword "hakko led" within the Lights & Lighting category. There are no fluctuations or seasonal variations noted in the search data, which remains at zero throughout the entire year-long observation period.
The lack of web search volume for "hakko led" could be attributed to various factors such as market saturation, brand recognition, or product availability, but the data provided does not allow for deeper analysis into these potential causes. It is important to note that zero web search volume can indicate that the product or brand is either not well-known, not actively searched for, or possibly not present in the market segment being observed.