


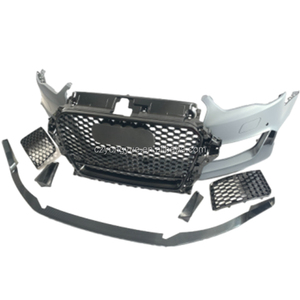


Types of Audi TT Front Bumpers
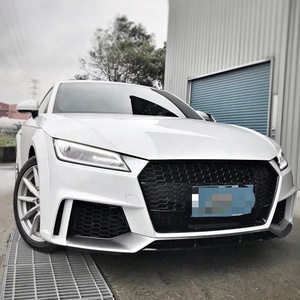
The Audi TT front bumper is more than just a protective component - it's a defining element of your vehicle's appearance and aerodynamic profile. Each design variant offers a unique combination of aesthetics and functionality that can dramatically transform your TT's character.
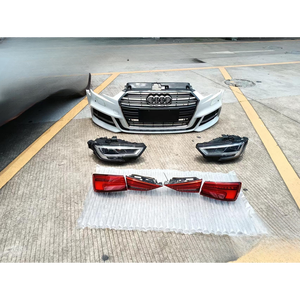
Standard Design
The classic Audi TT front bumper features elegant simplicity with:
- Rectangular front grille with horizontal slats
- Square or rectangular air vents for engine cooling
- Smooth contours with minimal sharp edges
- Balanced proportions that complement the vehicle's lines
Best for: Drivers who appreciate timeless elegance and classic styling
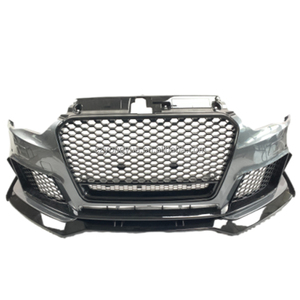
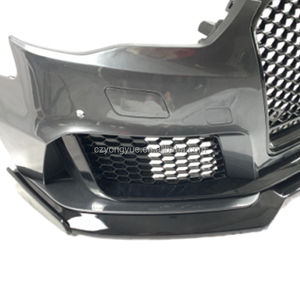
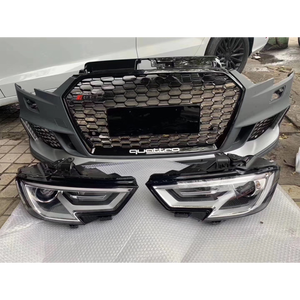
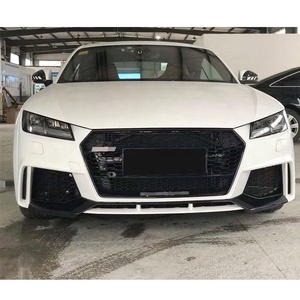
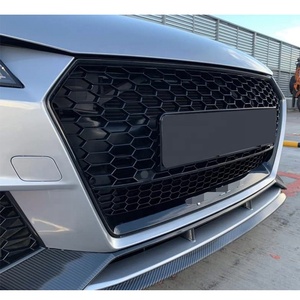
Sport Design
Featured on the Audi TT S and TT RS models, this performance-oriented design includes:
- Hexagonal or honeycomb front grille pattern
- Angular, aggressive air intake vents
- Integrated front spoiler or lip for improved aerodynamics
- Lower overall profile for reduced drag
Best for: Performance enthusiasts seeking an aggressive, track-inspired look
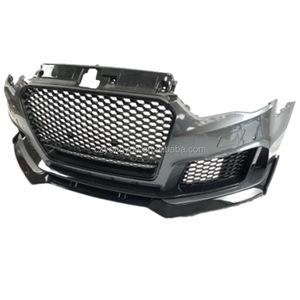
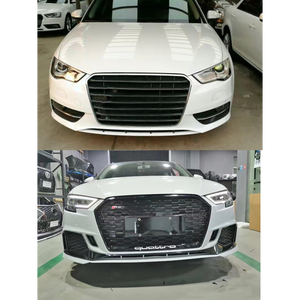
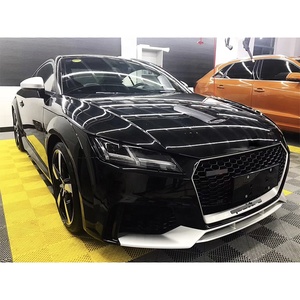
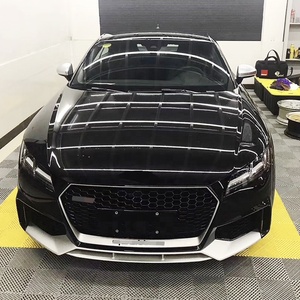
Black Optic Design
This sophisticated variant adds dark accents to the TT's front profile:
- High-gloss or matte black grille surround
- Dark-finished air intake frames
- Black or dark gray trim elements
- Contrasting design that emphasizes the bumper's contours
Best for: Owners wanting a contemporary, upscale appearance with visual contrast
S-Line Design
This premium option enhances both luxury and performance elements:
- Enlarged front grille with distinctive S-line badging
- Sculpted air vents with premium finishes
- Integrated aerodynamic elements including diffusers
- Enhanced ground effects for improved handling
Best for: Drivers seeking a balanced blend of luxury and performance aesthetics
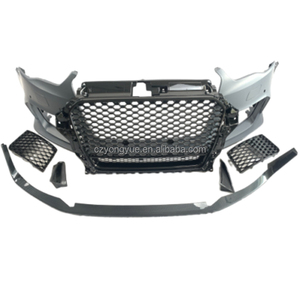
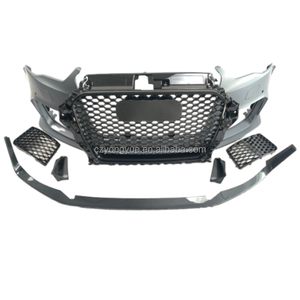
Custom Design
Aftermarket options from specialized manufacturers offer:
- Unique styling elements not available from factory designs
- Custom aerodynamic profiles for specific performance goals
- Personalized aesthetic touches and material choices
- Specialized features like extra cooling vents or tow hook provisions
Best for: Enthusiasts seeking a distinctive, personalized appearance
Expert Tip: When selecting between different Audi TT front bumper designs, consider not just aesthetics but also your driving style. Sport and S-Line designs often provide better cooling for high-performance driving, while custom designs may affect aerodynamics in ways that impact fuel efficiency.
Specification & Maintenance of Audi TT Front Bumpers
Proper maintenance ensures your Audi TT front bumper retains its appearance and structural integrity for years to come. Follow these essential care practices to maximize lifespan and performance.
Inspection Protocols
Regular comprehensive inspections can prevent minor issues from developing into costly problems:
- Check for cracks, chips, and scratches monthly
- Inspect mounting points and hardware for looseness quarterly
- Examine for UV damage and color fading seasonally
- Verify proper alignment with headlights and hood
- Assess any impact damage immediately after incidents
Proper Cleaning Techniques
Preserve finish and prevent damage with these cleaning practices:
- Use pH-neutral automotive soap designed for painted surfaces
- Apply with microfiber wash mitts or soft sponges only
- Clean stubborn insect remains with specialized bug remover
- Rinse thoroughly with clean water to prevent soap residue
- Dry completely with soft microfiber towels to prevent water spots
Professional Polishing
Restore and maintain your bumper's original luster:
- Use Audi-approved polishing compounds for best results
- Apply polish with dual-action polisher at low speeds
- Work in sections using minimal pressure
- Follow with a high-quality carnauba or synthetic sealant
- Avoid aggressive compounds that can damage clear coat
Paint Touch-Up Procedures
Address minor damage promptly to prevent corrosion:
- Identify exact paint code from vehicle documentation
- Clean damaged area thoroughly before application
- Apply primer for deeper chips as needed
- Use fine brush for precise touch-up application
- Allow proper curing time between coats
Clear Coat Protection
Maintain the protective layer that keeps your bumper looking new:
- Apply automotive-grade clear coat in thin, even layers
- Ensure proper ventilation during application
- Allow full cure time according to manufacturer specifications
- Consider professional ceramic coating for maximum protection
- Reapply protective treatments annually or as recommended
Important: Never use household cleaners or abrasive materials on your Audi TT front bumper. These can damage the clear coat and paint, leading to premature deterioration and costly repairs. Always use automotive-specific products designed for painted surfaces.
How to Choose Audi TT Front Bumpers
Selecting the ideal front bumper for your Audi TT requires careful consideration of several key factors. The right choice can enhance your vehicle's appearance, performance, and value.
Purpose & Function
Different bumpers serve different primary purposes:
- Protection: Reinforced designs with impact absorption
- Aesthetics: Stylized designs that enhance vehicle appearance
- Aerodynamics: Performance-oriented designs that reduce drag
- Multifunctional: Balanced designs addressing multiple needs
Consider your driving environment and habits when determining your primary need.
Design Compatibility
Ensure aesthetic and functional harmony with your vehicle:
- Match bumper design to your TT's overall styling theme
- Consider how the bumper complements other exterior components
- Verify compatibility with your specific TT model and year
- Check for proper integration with lights, sensors, and grilles
Material Quality
Bumper construction significantly impacts durability and performance:
- OEM ABS Plastic: Factory-grade durability and fit
- Fiberglass: Lightweight with good paintability
- Carbon Fiber: Premium lightweight strength
- Polyurethane: Excellent impact resistance and flexibility
Higher-quality materials typically command higher prices but offer better longevity.
Installation Considerations
Factor in the complexity and requirements of installation:
- Verify if bumper includes all necessary mounting hardware
- Consider compatibility with existing sensors and accessories
- Assess whether professional installation will be required
- Check if modification to the vehicle may be necessary
Some aftermarket bumpers may require additional modifications not anticipated in the purchase price.
Budget & Value
Balance cost considerations with quality and longevity:
- OEM bumpers typically cost more but offer perfect fit
- Aftermarket options range widely in price and quality
- Factor in potential additional costs (painting, hardware, etc.)
- Consider long-term value rather than just initial price
A quality bumper is an investment in your vehicle's appearance and value.
Smart Buying Tip: Always verify that any Audi TT front bumper you purchase comes with certification of material quality and manufacturing standards. Bumpers play a critical safety role in minor collisions, so compromising on quality can have consequences beyond just aesthetics.
How to DIY and Replace Audi TT Front Bumpers
Replacing your Audi TT front bumper can be accomplished as a DIY project with the right preparation, tools, and patience. Follow this comprehensive guide for a successful installation.
Step-by-Step Replacement Guide
-
Gather necessary tools and materials
You'll need socket sets, Torx screwdrivers (T20, T25, T30), plastic trim removal tools, rivet tools, and appropriate replacement hardware. Having all tools ready before starting will make the process smoother.
-
Prepare your vehicle
Park on level ground, engage parking brake, disconnect the battery, and allow at least 30 minutes for all electrical systems to fully discharge before beginning work.
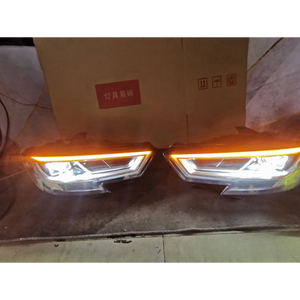
-
Remove headlight assemblies
Access and remove the mounting bolts for each headlight (typically located at the top and sides of the assembly). Carefully disconnect electrical connectors and remove headlights, setting them aside in a safe location.
-
Detach the splash shield
Working from underneath the vehicle, locate and remove all fasteners securing the plastic splash shield to the bottom of the bumper. This typically involves Torx screws and plastic push clips that can be carefully pried out.
-
Disconnect electrical components
Locate and disconnect all electrical connections to the bumper, including fog lights, parking sensors, and ambient temperature sensors. Make note of connector locations for reassembly.
-
Remove bumper mounting hardware
Locate the bolts securing the bumper to the vehicle chassis. These are typically accessible from the engine bay and wheel wells. Remove all mounting bolts and set aside in labeled containers.
-
Detach and remove the old bumper
With all fasteners removed, carefully pull the bumper away from the vehicle. This may require a firm but gentle rocking motion. Have a helper assist to prevent dropping or scratching the bumper during removal.
-
Prepare the new bumper
If your new bumper requires painting, this should be done before installation. Transfer any components from the old bumper (fog lights, sensors, grilles) to the new one before proceeding.
-
Position and align the new bumper
With assistance, carefully position the new bumper against the vehicle, ensuring all mounting points align properly. Begin hand-threading bolts to hold it in position while checking alignment.
-
Secure and reconnect components
Once properly aligned, tighten all mounting bolts to specification. Reconnect all electrical components, fog lights, and sensors. Verify all connections are secure before proceeding.
-
Reinstall peripheral components
Reattach the splash shield, reinstall headlight assemblies, and verify all fasteners are secure. Reconnect the battery and test all lights and sensors to ensure proper function.
Safety Warning: Always wear appropriate safety equipment including gloves and eye protection when working on your vehicle. Bumpers can have sharp edges, and disconnecting electrical components carries risk if proper procedures aren't followed. If you're uncertain about any step, consult with a professional mechanic.
Professional Tip: Take photos of each step during disassembly to serve as a reference during reassembly. This can be especially helpful for remembering the routing of electrical wires and the positioning of small clips and fasteners that might otherwise be confusing during reinstallation.
Frequently Asked Questions
Which Audis have the TT front bumper?
The Audi TT front bumper is specifically designed for the Audi TT sports car lineup. This includes all generations of the TT Coupe and TT Roadster models. While the bumper design has evolved across generations, each is unique to the TT platform and not directly compatible with other Audi models without significant modifications. Each TT generation (Mk1, Mk2, and Mk3) has its own specific bumper designs, with further variations for special editions and performance variants like the TTS and TTRS.
What is the warranty period for Audi TT front bumpers?
Warranty periods for Audi TT front bumpers vary significantly based on the source and type of bumper:
- OEM (Original Equipment Manufacturer): When purchased new from Audi, bumpers typically carry the standard new parts warranty of 2 years with no mileage limitation
- Certified Pre-Owned Parts: May include warranties ranging from 1-2 years depending on the dealer program
- Aftermarket Manufacturers: Warranty periods range from 1-10 years depending on the manufacturer and quality tier
- Premium Aftermarket: High-end manufacturers may offer extended warranties up to 10 years for their products
It's important to note that warranties typically only remain valid if the bumper is installed correctly according to manufacturer specifications. Improper installation that leads to damage will typically void warranty coverage.
How can I find the right Audi TT front bumper for my vehicle?
To ensure you select the correct front bumper for your Audi TT, follow these steps:
- Identify your exact model and year: Audi TT bumpers are specific to each generation and sometimes even to specific model years within a generation
- Determine your current trim level: Standard TT, TTS, and TTRS models all have different bumper designs
- Check your VIN number: When purchasing from Audi or authorized dealers, providing your Vehicle Identification Number ensures perfect compatibility
- Consider any existing modifications: If your vehicle has aftermarket grilles or accessories, ensure any new bumper will accommodate these elements
- Consult with specialists: Audi parts departments or specialized Audi aftermarket retailers can help verify compatibility
When purchasing, always verify that the bumper specifically states compatibility with your exact model year and trim level to avoid costly returns or modifications.
Can the Audi TT front bumper be painted to match the car's color?
Yes, Audi TT front bumpers can definitely be painted to match your vehicle's color. In fact, most aftermarket and replacement bumpers come unpainted (often in black or primer gray) specifically so they can be finished to match your car's exact color. Here are important considerations for painting your bumper:
- Color matching: Use your vehicle's color code (found in the driver's door jamb or owner's manual) to ensure exact color matching
- Professional painting recommended: Automotive painting requires specialized equipment and techniques to achieve factory-quality results
- Preparation is critical: Proper sanding, priming, and surface preparation directly impact the final finish quality
- Multi-stage process: Professional painting includes primer, base coat, color coat, and clear coat applications
- Curing time: Newly painted bumpers require proper curing time (typically 24-48 hours) before installation
While DIY painting kits are available, most experts recommend professional painting for best results. A properly painted bumper should be indistinguishable from the rest of your vehicle's finish when completed correctly.


 浙公网安备 33010002000092号
 浙B2-20120091-4