


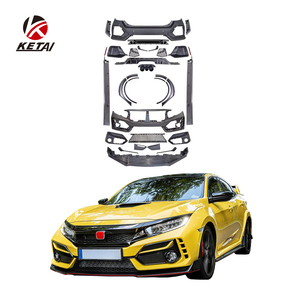


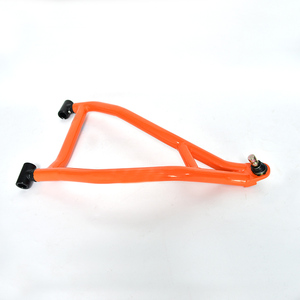


Types of ATV A Arms
All-terrain vehicles (ATVs) have become increasingly popular among off-road enthusiasts, driving significant growth in the aftermarket suspension industry. ATV A arms, also known as control arms or wishbones, are critical components of the suspension system that dramatically impact vehicle performance, handling, and rider comfort.
Expert Tip: A properly functioning suspension system allows your ATV to maintain optimal ground contact across varied terrain, significantly improving steering control and overall ride quality.
Upper ATV A Arms
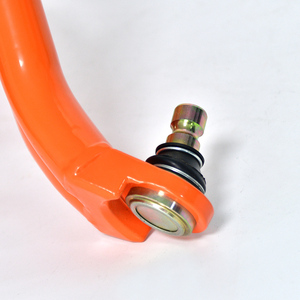
Upper A-arms connect the suspension system to the ATV's frame and house the ball joints that link to the chassis. Their primary function is stabilizing the suspension by controlling the camber angle, ensuring all four tires maintain proper ground contact.
Best for: Competitive racers often prefer adjustable ball joint mounts on upper A-arms to customize camber angles for specific track conditions.
Lower ATV A Arms
Lower A-arms connect the suspension system to the ATV's wheel hubs via integrated ball joints. They primarily control the toe angle of the suspension system, which directly impacts steering response and stability.
Key benefit: Adjusting lower A-arm length and mounting points can significantly improve cornering stability by optimizing tire contact during turns.
| A Arm Type | Primary Function | Performance Impact | Typical Adjustability |
|---|---|---|---|
| Upper A Arms | Camber angle control | Improved ground contact and traction | Ball joint mount position |
| Lower A Arms | Toe angle management | Enhanced cornering stability | Length and mounting points |
Specifications & Maintenance of ATV A Arms
When researching ATV A arms for sale, understanding the key specifications will help you make an informed purchase decision that meets your specific riding needs.
| Specification | Details | Impact on Performance |
|---|---|---|
| Material | Steel, aluminum, chromoly steel, carbon fiber | Affects strength, weight, durability, and price point |
| Finish | Anodized, powder-coated, painted | Impacts corrosion resistance and aesthetic appearance |
| Size | Variable lengths, widths and heights | Influences stability, ground clearance, and handling characteristics |
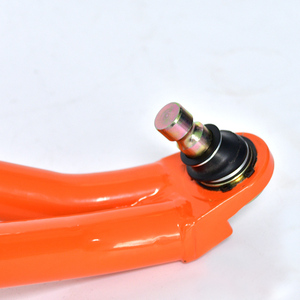
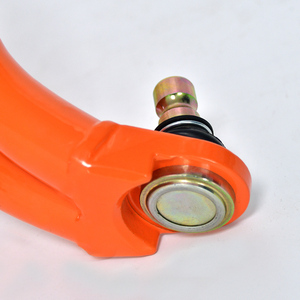
| Ball Joint Type | Press-in, screw-in, threaded | Determines compatibility with suspension components |
| Fitment | Make/model specific | Ensures proper installation and performance |
| Lift Kit Integration | With/without lift capabilities | Affects ground clearance for off-road capabilities |
| Warranty | Variable by manufacturer | Provides protection against defects and increases buyer confidence |
Essential Maintenance Practices
Proper maintenance of your ATV A-arms is critical for safety, performance, and longevity. Implement these practices into your regular maintenance routine:
Regular Inspections
- Check for visible wear, cracks, or damage
- Inspect ball joints for excessive play
- Examine bushings for deterioration
- Verify mounting hardware tightness
Preventative Maintenance
- Lubricate ball joints and bushings per manufacturer recommendations
- Clean thoroughly after muddy or wet riding conditions
- Protect with appropriate coatings if riding in corrosive environments
- Adhere to weight limits to prevent undue stress
Safety Warning: Never continue riding with damaged, cracked, or severely bent A-arms. Compromised suspension components can lead to sudden failure and serious accidents. When in doubt, replace rather than risk safety.
How to Choose ATV A Arms
Selecting the optimal ATV A arms for your vehicle and riding style involves careful consideration of several key factors. This guide will help you make an informed decision when upgrading or replacing your suspension components.
Material Considerations
Aluminum
- Lightweight construction
- Excellent corrosion resistance
- Good strength-to-weight ratio
- Affordable mid-range option
Steel
- Maximum strength and durability
- Better for extreme impacts
- Significantly heavier
- More susceptible to rust
Pro Tip: For most recreational riders, aluminum A-arms offer the best balance of durability, weight, and corrosion resistance.
Size & Adjustability Factors
| Size Type | Best For |
|---|---|
| Standard Size | Trail riding, casual use, stock replacement |
| Oversized | Performance riding, increased stability |
| Adjustable | Competitive racing, varied terrain conditions |
| Non-Adjustable | Budget-conscious buyers, simplicity |
Expert Advice: When upgrading A-arms, consider your riding style carefully. While premium racing A-arms offer maximum adjustability, they may require frequent tuning and maintenance that casual weekend riders might find unnecessary.
Additional Selection Criteria
- Brand Reputation: Research manufacturer quality control, customer service, and warranty policies. Well-established brands typically offer better engineering and materials.
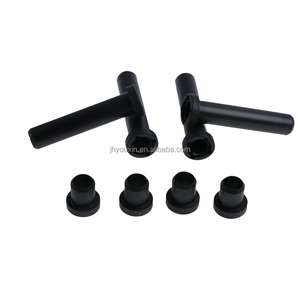
- Included Accessories: Complete kits with all mounting hardware, ball joints, and bushings provide better value than bare A-arms requiring separate component purchases.
- Compatibility: Verify exact fitment for your ATV's make, model, and year. Even slight variations can lead to installation problems or performance issues.
- User Reviews: Read experiences from riders with similar ATVs and riding styles to gauge real-world performance.
How to DIY and Replace ATV A Arms
With proper tools and mechanical knowledge, replacing your ATV's A-arms can be accomplished at home. Follow this step-by-step guide for a successful installation.
Before You Begin: Gather all necessary tools including socket set, wrenches, pliers, hammer, and possibly a spring compressor (depending on your ATV's suspension design). Ensure you have the correct replacement A-arms, bushings, and hardware.
1 Safety Preparation
Position your ATV on level ground and engage the parking brake. Wear appropriate safety gear including gloves and eye protection. Disconnect the battery to prevent electrical issues.
2 Elevate and Secure the ATV
Use a quality jack to lift the ATV and secure it firmly with jack stands. The vehicle must be completely stable before beginning work underneath it.
3 Remove the Wheels
Use a lug wrench to remove the wheel lug nuts, then carefully remove the wheels to gain clear access to the suspension components.
4 Disconnect Connected Components
Depending on your ATV model, you'll need to disconnect various components connected to the A-arms, including:
- Tie rod ends (may require tie rod end puller)
- Shock absorber mounts
- Sway bar links
- Brake line brackets (be careful not to damage lines)
5 Remove Old A-arms
Locate and remove the bolts securing the A-arms to both the chassis and wheel hub/differential. You may need penetrating oil for stubborn bolts and a mallet to free stuck components. Take note of the exact positioning before removal.
Important: Document the orientation of all washers, spacers, and bushings during removal. Take photos if necessary to ensure correct reassembly.
6 Install New A-arms
Carefully align the new A-arms with their mounting points and insert the bolts through the bushings. Hand-tighten initially to ensure proper alignment before final torquing.
7 Reconnect Components
Reattach all the previously disconnected suspension components to the new A-arms. Follow the reverse order of disassembly, ensuring proper torque specifications for each connection.
8 Reinstall Wheels
Place the wheels back onto the hubs and hand-tighten the lug nuts. Lower the ATV to the ground, then torque the lug nuts in a star pattern to manufacturer specifications.
9 Final Inspection and Testing
Thoroughly check all connections, ensuring nothing is loose or missing. Bounce each corner of the ATV to settle the suspension, then recheck all bolts. Take a slow test ride in a controlled area before regular use.
Pro Tip: If you're replacing A-arms due to an accident or impact, also inspect related components like ball joints, tie rods, and wheel bearings for damage. It's often more efficient to replace multiple worn components simultaneously.
Frequently Asked Questions
Q1: What are the signs of damaged A-arms?
Damaged A-arms typically manifest through multiple symptoms that affect your ATV's handling and performance:
- Handling Issues: Difficulty steering or maintaining straight travel
- Unusual Noises: Clunking, popping, or creaking when turning or going over bumps
- Visual Indicators: Visible bends, cracks, or breaks in the A-arm structure
- Alignment Problems: ATV leaning to one side when stationary or uneven tire wear
- Bushing Deterioration: Torn, cracked or missing bushing rubber
- Ball Joint Wear: Excessive play in the suspension components
Q2: Can I continue using an ATV with a damaged A-arm?
No, continuing to operate an ATV with damaged A-arms presents serious safety risks:
Safety Warning: Riding with damaged A-arms can lead to catastrophic suspension failure, resulting in loss of control and potential accidents. Even minor damage can progressively worsen under normal riding conditions.
Damaged A-arms compromise the entire suspension system, affecting steering control, stability, and the ATV's ability to absorb impacts. This not only endangers the rider but can lead to accelerated wear of other components. Always repair or replace damaged A-arms before operating the vehicle.
Q3: What is the difference between upper and lower A-arms?
Upper and lower A-arms have distinct positions and functions in the ATV suspension system:
| Feature | Upper A-Arms | Lower A-Arms |
|---|---|---|
| Position | Above the shock absorber | Below the shock absorber |
| Mounting Points | Two points on the chassis | One point on the chassis |
| Primary Function | Controls camber angle | Controls toe angle |
| Load Bearing | Less primary weight | More primary weight |
| Design Variations | Often more adjustable | Typically more reinforced |
Together, these components work as a system to maintain proper wheel alignment through the suspension's range of motion.
Q4: Can I upgrade to high-performance A-arms?
Yes, upgrading to high-performance A-arms is a popular enhancement for many ATV enthusiasts. High-performance options typically offer:
- Increased strength through improved materials (chromoly steel, reinforced aluminum)
- Better geometry for improved handling characteristics
- Adjustability for fine-tuning suspension behavior
- Enhanced ground clearance for technical terrain
- Better shock absorption capabilities
When upgrading, ensure compatibility with your specific ATV model and consider consulting with suspension specialists to match the A-arms to your riding style and terrain requirements.
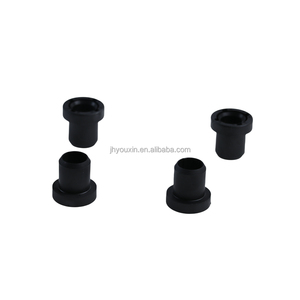
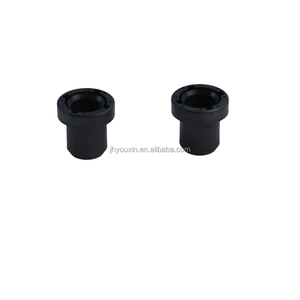
Q5: What is the A-arm bushing and why is it important?
A-arm bushings are critical components that serve multiple essential functions in your ATV's suspension system:
Function & Purpose
- Creates a flexible connection between A-arms and the frame
- Absorbs vibration and reduces noise transfer
- Allows controlled movement of suspension components
- Prevents metal-to-metal contact that causes premature wear
Types & Materials
- Rubber: Standard OEM option, good vibration damping, moderate durability
- Polyurethane: Increased durability, better performance, less flex
- Delrin/UHMW: Premium option for racing, minimal flex, highest precision
Worn bushings lead to excessive play in the suspension, altered geometry, and compromised handling. Regular inspection and timely replacement are essential for maintaining optimal suspension performance.


 浙公网安备 33010002000092号
 浙B2-20120091-4