


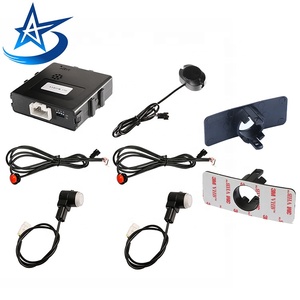


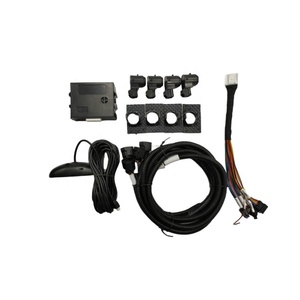
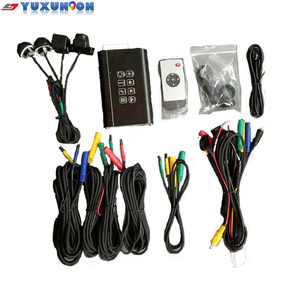


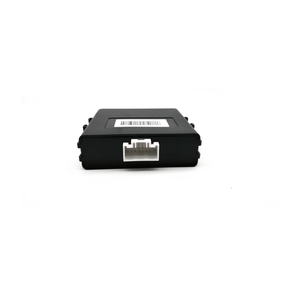


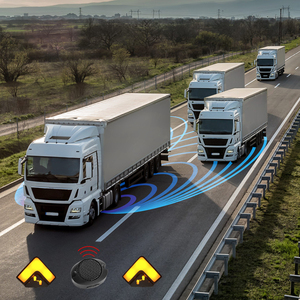


Types of Aftermarket Parking Sensors
Aftermarket parking sensors, also known as parking assist systems, are available in different types and configurations to cater to various vehicle models and customer preferences. Each type offers unique advantages and capabilities to enhance parking safety and convenience.
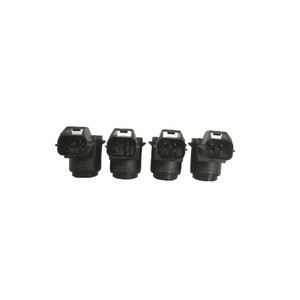
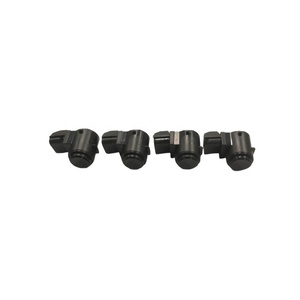
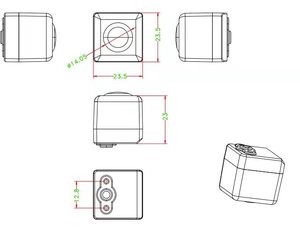
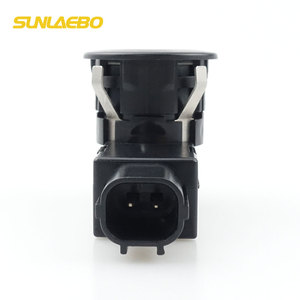
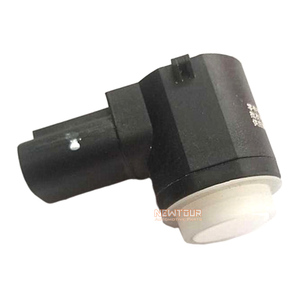
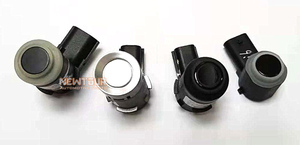
Ultrasonic Parking Sensors
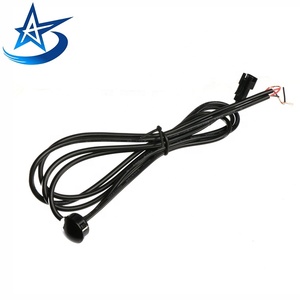
The most commonly used type of parking sensor systems. They employ ultrasonic sound waves to detect surrounding objects' proximity and movement.
- Typically come in sets of four or six
- Installed on the vehicle's rear or front bumper
- Alert driver through audible beeps or visual displays
Best for: Affordability, reliability, and effectiveness in low-speed parking situations
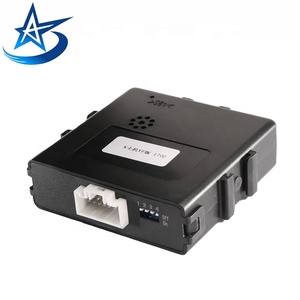
Electromagnetic Parking Sensors
These sensors use electromagnetic fields to detect objects close to a vehicle. They create a magnetic field around the vehicle, and any object intruding on the field triggers an alarm.
- Installed inside the bumper rather than on its surface
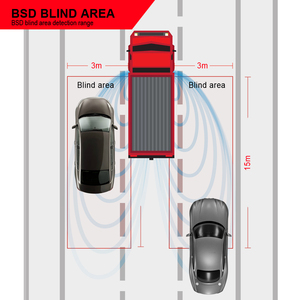
- Primarily used for rear parking assistance
- Particularly useful in preventing backovers
Best for: Clean bumper appearance, less visible installation
Laser Parking Sensors
Advanced and high-precision sensor systems that utilize laser technology to detect obstacles and measure distances with exceptional accuracy.
- Emit laser beams that reflect off surrounding objects
- Analyze reflected signals to determine proximity
- Offer high accuracy and long-range detection
Best for: Premium applications requiring high precision
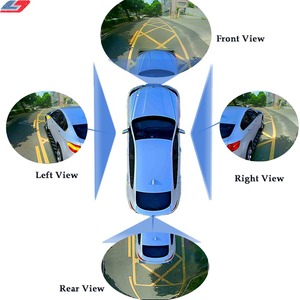
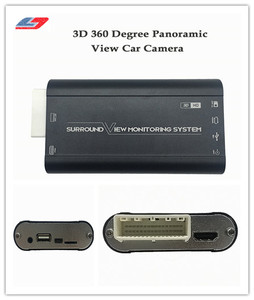
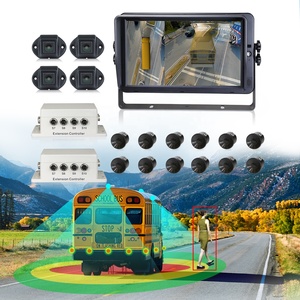
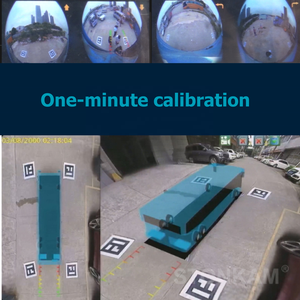
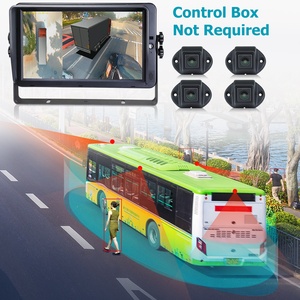
Camera-based Parking Sensors
Integrate parking assist with a camera system to provide a visual representation of the vehicle's surroundings on the infotainment screen.
- Combine object detection with visual feedback
- Display distance guidelines and identify obstacles
- Provide comprehensive situational awareness
Best for: Enhanced visual feedback and safety in crowded spaces
Hybrid Parking Sensors
Combine multiple sensor technologies, such as ultrasonic and camera-based systems, to enhance parking assistance capabilities.
- Leverage strengths of different sensor types
- Provide comprehensive obstacle detection
- Offer real-time visual information
Best for: Maximum safety and convenience for premium vehicles
Expert Tip: For most consumer applications, ultrasonic sensors offer the best balance of cost, reliability, and performance. They're also the easiest to install as a DIY project.
| Sensor Type | Installation Difficulty | Cost Range | Detection Range | Best Application |
|---|---|---|---|---|
| Ultrasonic | Moderate | $50-$150 | 0.3-2.0m | General purpose parking assistance |
| Electromagnetic | Moderate to High | $100-$200 | 0.3-1.5m | Clean bumper appearance |
| Laser | High | $150-$300 | 0.3-3.0m | Precision parking applications |
| Camera-based | High | $200-$400 | Varies | Visual confirmation needs |
| Hybrid | Very High | $250-$500+ | 0.3-3.0m | Premium vehicles requiring comprehensive coverage |
Specifications and Maintenance of Aftermarket Parking Sensors
Key Specifications
Aftermarket parking sensors are available in a variety of specifications to meet different customer needs. Understanding these specifications is essential for selecting the right system for your vehicle:
Technical Specifications
- Sensor count: Ranges from 2 to 6 sensors; higher count offers better coverage
- Detection range: Typically 0.3 to 2.0 meters for obstacle detection
- Operating frequency: 40 kHz to 200 kHz for minimized interference
- Weatherproofing: Protection from moisture, dust, and debris for durability
User Interface Features
- Display type: LED or LCD screens showing distance and obstacle location
- Vocal alerts: Continuous or intermittent audio warnings
- Distance indicators: Visual representation of proximity to objects
- Sensitivity adjustments: Customizable detection parameters
Maintenance Guidelines
Proper maintenance ensures the longevity and effectiveness of your aftermarket parking sensors. Following these recommended practices will help maintain optimal performance:
Regular Cleaning
Dirty sensors can significantly affect detection accuracy and reliability.
- Clean sensors at least monthly with a soft cloth
- Use mild soap and water for stubborn dirt
- Avoid abrasive materials that could scratch sensors
- Pay special attention after driving in muddy conditions
System Inspection
Regular inspections help identify issues before they become serious problems.
- Inspect wiring for cuts, abrasions or loose connections
- Check sensor mounting for secure attachment
- Test system functionality regularly with a known object
- Listen for changes in alert tones that might indicate problems
Professional Tip: Apply a thin layer of silicone-based protectant to sensor faces every 3-6 months to prevent UV damage and maintain water resistance. This simple step can significantly extend sensor life, especially in harsh climates.
| Maintenance Task | Frequency | Importance | Tools Needed |
|---|---|---|---|
| Clean sensor surfaces | Monthly | High | Microfiber cloth, mild soap |
| Inspect wiring | Quarterly | Medium | Flashlight, visual inspection |
| Test system functionality | Monthly | High | Small object for detection test |
| Check sensor alignment | Bi-annually | Medium | Level, manufacturer specifications |
| Apply protective coating | Every 3-6 months | Medium | Silicone-based protectant |
How to Choose Aftermarket Parking Sensors
Selecting the right aftermarket parking sensors requires careful consideration of various factors to ensure compatibility, performance, and value. Whether you're a wholesaler stocking inventory or an individual buyer, these criteria will help guide your decision-making process.
Technical Considerations
Vehicle Compatibility
- Ensure sensors are adaptable to different vehicle makes and models
- Consider customization options for various vehicle sizes and shapes
- Check voltage compatibility with vehicle electrical systems
Sensor Quality & Coverage
- Prioritize high-quality construction for durability
- Select sensors with sufficient detection range (minimum 1.5m recommended)
- Ensure adequate coverage of vehicle blind spots
User Experience Factors
Display and Alert System
- Opt for clear, easy-to-read displays with distance indicators
- Choose systems with adjustable volume for audible alerts
- Consider multi-zone detection with differentiated warnings
Ease of Installation
- Select sensors with comprehensive installation instructions
- Prioritize kits that include all necessary components
- Consider wireless options for simpler installation
Business Considerations
Reliability & Durability
- Choose sensors constructed from weather-resistant materials
- Select models with temperature tolerance suitable for your climate
- Research brand reputation and reliability history
Warranty & Support
- Prioritize products with minimum 1-year warranty coverage
- Ensure availability of technical support for installation assistance
- Check replacement part availability for long-term serviceability
Value-Added Features
Price & Value for Money
- Compare feature sets across different price points
- Consider long-term value over initial purchase cost
- Look for volume discounts when purchasing for wholesale
Additional Features
- Consider sensors with cross-traffic alert capabilities
- Look for integration options with other vehicle safety systems
- Evaluate smartphone connectivity features for advanced applications
Important Consideration: When selecting parking sensors for business inventory, prioritize systems that offer universal compatibility and straightforward installation. These features will appeal to a broader customer base and reduce returns due to compatibility issues or installation difficulties.
| Selection Criteria | Priority Level | Key Considerations |
|---|---|---|
| Vehicle Compatibility | Critical | Universal fit vs. vehicle-specific, voltage requirements, mounting options |
| Sensor Quality | High | Detection accuracy, range coverage, environmental resistance |
| User Interface | Medium | Display clarity, alert customization, multi-zone indication |
| Installation Complexity | High | Wiring requirements, drilling needs, calibration process |
| Durability | High | IP rating for water/dust resistance, operating temperature range |
| Warranty & Support | Medium | Warranty duration, availability of technical assistance |
| Price Point | Medium | Value relative to features, competitive positioning |
How to DIY Install and Replace Aftermarket Parking Sensors
Installing aftermarket parking sensors is a DIY-friendly project that can enhance your vehicle's safety features without professional assistance. While manufacturer instructions should always be your primary guide, this general installation process works for most ultrasonic sensor systems.
Pro Tip: Before beginning installation, test all components of your parking sensor kit to ensure everything works properly. This simple step can save hours of troubleshooting after installation.
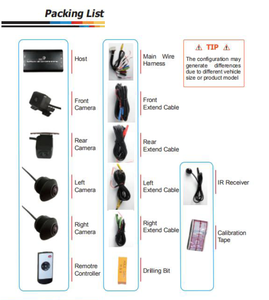
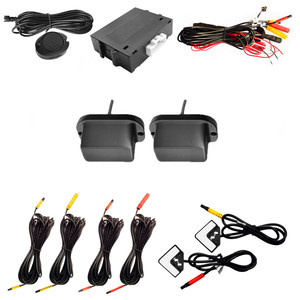
Installation Tools and Materials
Essential Tools
- Hole saw (sized according to sensor diameter)
- Power drill with various bits
- Wire strippers and crimpers
- Electrical tape or heat shrink tubing
- Multimeter for electrical testing
- Plastic trim removal tools
Optional but Helpful
- Cable fishing tool
- Soldering iron and solder
- Zip ties for wire management
- Painter's tape for marking
- Silicone sealant for waterproofing
- LED test light
Step-by-Step Installation Process
-
Preparation and Planning
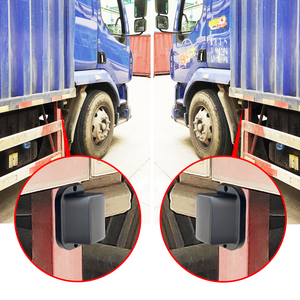
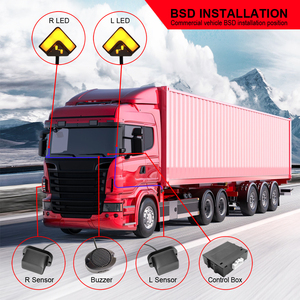
Disconnect the vehicle's battery before beginning any electrical work. Identify optimal sensor locations on your bumper, typically evenly spaced across the rear bumper at a height of 18-22 inches from the ground.
-
Mark and Drill Sensor Holes
Carefully mark the sensor positions on the bumper. Use the appropriate sized hole saw to drill holes for each sensor. Clean the edges of each hole to ensure proper sensor fit.
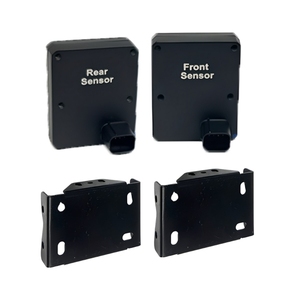
-
Install Sensors in Bumper
Insert each sensor into its designated hole, ensuring proper orientation (most sensors have a "top" indicator). Secure according to the manufacturer's instructions—usually with provided clips or brackets.
-
Run Wiring Through Vehicle
Route the sensor wiring through the bumper and into the vehicle's interior. This typically requires accessing the trunk area and may involve removing interior trim panels. Keep wires away from moving parts and heat sources.
-
Connect to Power Source
Connect the control unit to the vehicle's power supply. Most systems connect to the reverse light circuit so they activate automatically when the vehicle is in reverse. Follow the manufacturer's wiring diagram precisely.
-
Mount Display and Control Unit
Install the display unit in a visible location, typically on the dashboard or rear-view mirror. Mount the control unit in a protected location away from moisture and extreme temperatures.
-
Test and Calibrate System
Reconnect the battery, put the vehicle in reverse, and test the system's functionality. Adjust sensor sensitivity if needed and verify all sensors are working correctly by testing with an object at various distances.
-
Finalize Installation
Once testing confirms proper operation, secure all loose wiring with zip ties, reinstall any removed trim pieces, and apply silicone sealant around sensor edges if needed for additional waterproofing.
Safety Warning: If you're uncomfortable working with your vehicle's electrical system, consider professional installation. Improper wiring can damage both the parking sensor system and your vehicle's electrical components.
Troubleshooting Common Installation Issues
| Problem | Possible Cause | Solution |
|---|---|---|
| No power to sensors | Poor power connection or blown fuse | Check all wiring connections and fuse. Verify power at connection points with multimeter. |
| False alerts | Sensors mounted too low or at incorrect angle | Reposition sensors to recommended height (18-22" from ground) and ensure proper orientation. |
| Intermittent operation | Loose connections or water intrusion | Inspect all connections, apply dielectric grease to connections, and seal sensor edges. |
| Only some sensors working | Damaged sensor or improper wiring sequence | Verify each sensor works individually and check that sensors are connected in correct sequence. |
| System activates when not in reverse | Incorrect power connection | Ensure power wire is connected to reverse light circuit rather than constant power. |
Frequently Asked Questions
Q1: Do aftermarket parking sensors work as well as factory-installed ones?
Yes, high-quality aftermarket parking sensors can perform just as effectively as factory-installed systems. The key differences lie in integration with the vehicle's existing systems and aesthetics. Premium aftermarket sensors offer comparable detection accuracy and reliability to OEM systems, while budget options may have more limited functionality. Performance depends largely on proper installation and the quality of components used.
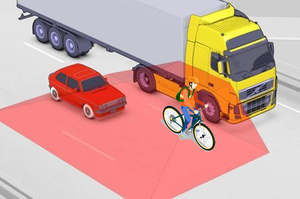
Q2: Can parking sensors detect pedestrians or smaller objects?
Most standard ultrasonic parking sensors are designed primarily to detect larger solid objects like walls, poles, and other vehicles. They have limitations when it comes to detecting smaller objects or pedestrians, especially children. Higher-end systems that incorporate cameras and advanced processing algorithms offer better detection of pedestrians, but no system should be relied upon exclusively for pedestrian detection. Always maintain visual awareness of your surroundings when parking.
Q3: Can parking sensors be installed on any vehicle?
Yes, aftermarket parking sensors can be installed on nearly any vehicle type, from compact cars to large trucks and RVs. Universal kits are designed to accommodate different bumper materials, thicknesses, and configurations. However, installation complexity may vary depending on the vehicle's construction. Vehicles with plastic bumpers are typically easier to work with than those with metal bumpers. Some specialized vehicles may require custom mounting solutions or professional installation.
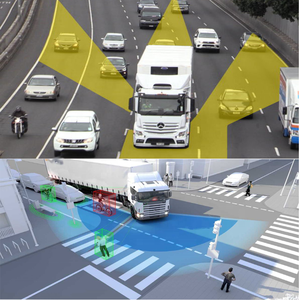
Q4: Are parking sensors effective in crowded or busy environments?
Parking sensors can be helpful in busy environments, but they do have limitations. In crowded areas with multiple moving objects, standard sensors may struggle to provide clear guidance due to too many detected obstacles. They work best when dealing with stationary objects and limited numbers of obstacles. Camera-based or hybrid systems offer better performance in crowded settings by providing visual context along with proximity warnings. In high-traffic areas, use parking sensors as an aid rather than relying on them exclusively.
Q5: How do parking sensors calculate distance to objects?
Parking sensors determine distance through different methods depending on their technology type:
- Ultrasonic sensors emit high-frequency sound waves that bounce off objects and return to the sensor. The system calculates distance based on the time taken for the sound wave to travel back (similar to echolocation).
- Electromagnetic sensors create a magnetic field and detect disturbances in this field caused by objects entering it. The strength of the disturbance indicates proximity.
- Laser sensors use light reflection principles, measuring the time taken for a laser beam to bounce back from an object.
- Camera-based systems use sophisticated image processing algorithms to estimate distances based on visual data and known reference points.


 浙公网安备 33010002000092号
 浙B2-20120091-4